
UPDATE: In early 2019, Facebook changed their policy and nonprofits are no longer able to link their Donate button to an external website. Read here for more information on fundraising as a nonprofit on Facebook.
Fundraising on Facebook lets you connect with a broad audience and reach new people. You can make it easy for folks who share your vision to donate to your organization by adding a Donate button to your page and posts, but you’ll need to use it wisely. Remember that winning over new donors is only one step in your fundraising journey!
Donor retention is all about follow-up.
If you want to personalize your follow-up and cultivate long-term support from Facebook donors, you’ll need a way to stay in touch. Unfortunately, using Facebook’s built-in payment processing often means sacrificing crucial donor data. There’s nothing quite as frustrating as having a new list of donors but not having their email addresses to be able to send them each a personalized thank-you message!
Luckily, it only takes a few minutes to link your Facebook Donate button to your nonprofit’s own donation form. In three easy steps, you can close the loop between Facebook and your nonprofit’s existing method for collecting donations online.
Here’s how you can do it.
Step 1: Set your page category
Make sure you’ve set your Facebook Page category to Nonprofit or Nonprofit Organization. This will give you different options for the call-to-action button on your page and posts, including Donate:
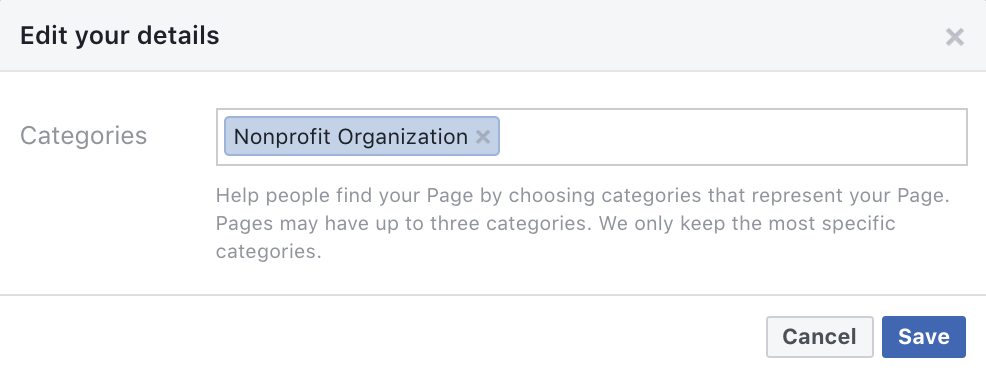
Hit Save when you’re done.
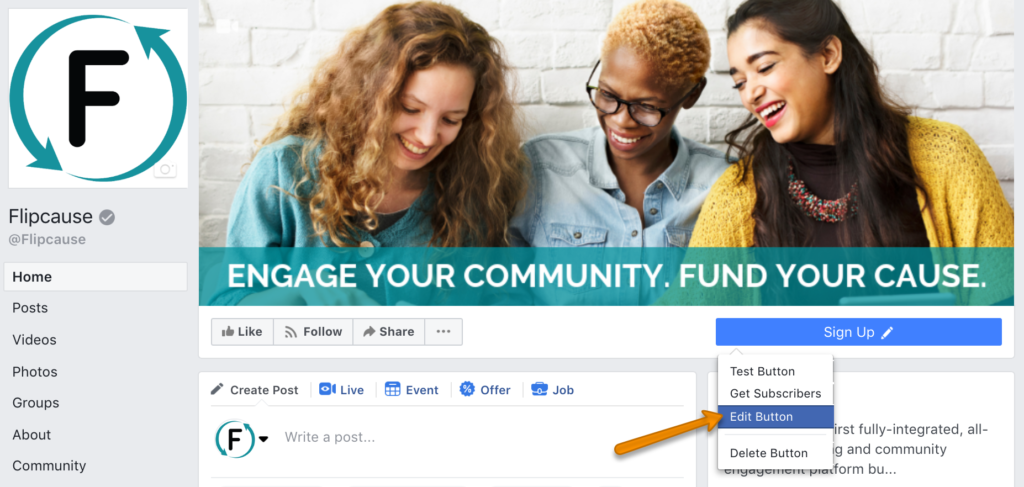
Step 2: Add your donate button
Now it’s time to edit your call-to-action button. From your page view, hover over the button and choose the Edit Button option from the menu:
Next, you’ll select the type of button you want people to see on your page and posts. To accept donations through your Facebook Page, choose the Donate option from the Shop with you or make a donation section:
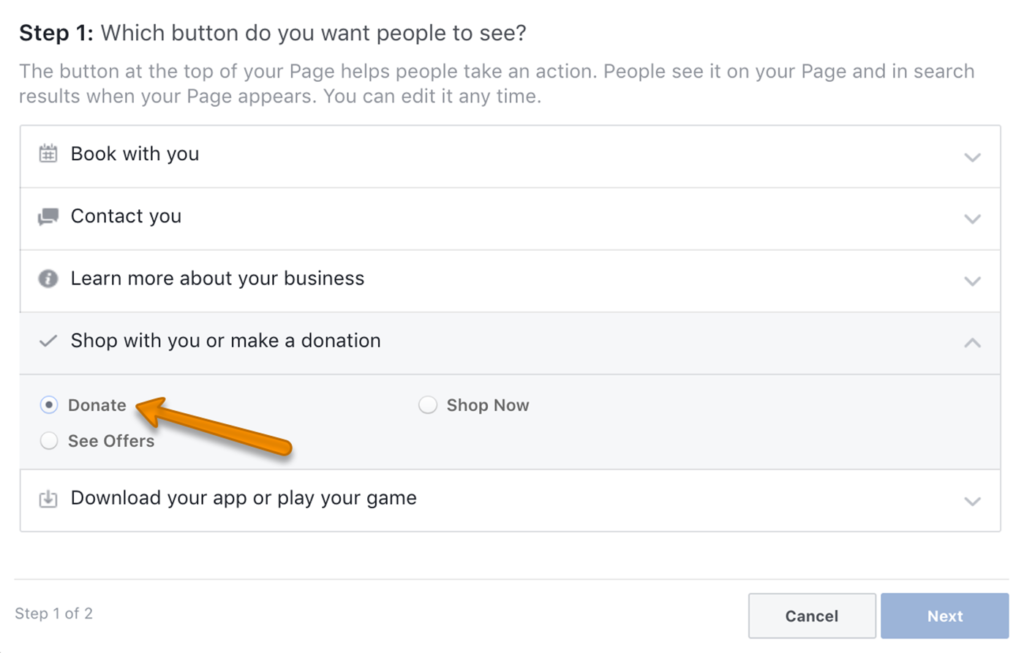
After selecting Donate, hit Next to move on to the last step!
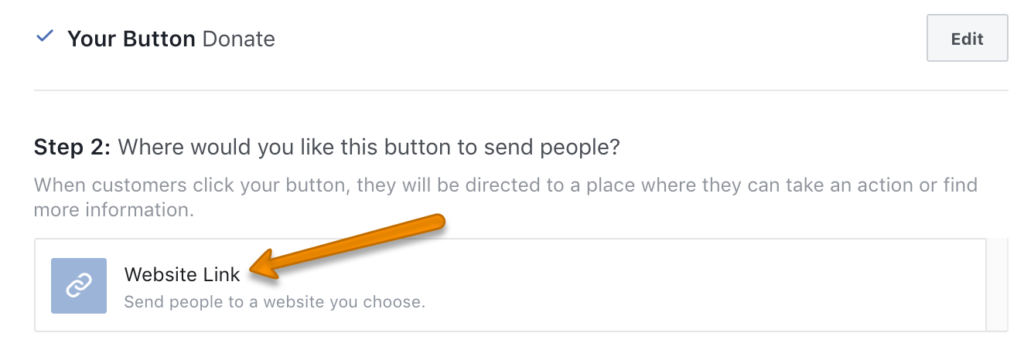
Step 3: Connect your donate button to your Donation form
At this point, you’ll be able to either:
- Connect your Donate button to Facebook’s integrated payment processor, which requires you to register your nonprofit with Facebook and lacks the ability to require email addresses from your supporters. Instead, you can make your Donate button work for you by selecting…
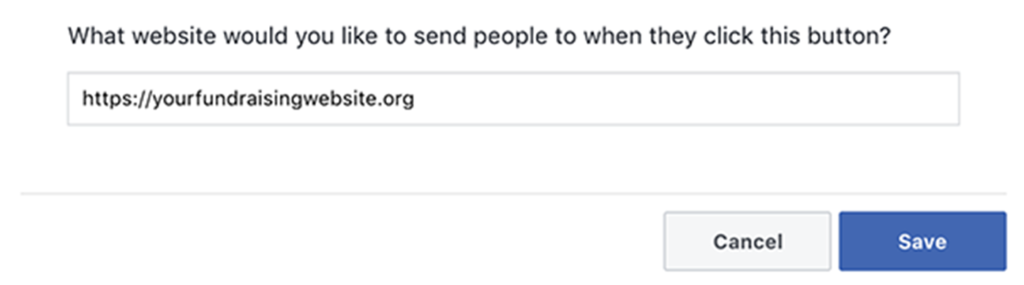
- Add a website link. The Website Link option lets you direct supporters to your nonprofit’s donation form, where you can collect some of your most important donor data! It also streamlines the process for your organization by centralizing where you collect your donations. Click on the option to add a website link:
Finally, copy and paste the URL for your existing donation page:
From here, hit Save and you should be all set! Make sure to go back and test the Donate button on your Facebook page to ensure that it leads your supporters to the right place. The next time you receive a donation through Facebook, you’ll be able to follow up like a pro and make your supporters feel good about giving.

Holly Lee
November 27, 2019Hello! Can you please tell me if Facebook has changed the button options? I followed your steps but do not see a way to “Add a website link.” Thank you for any guidance you can provide!
Darya Gorlova
November 27, 2019Hi Holly, on no, you’re right! It appears Facebook made changes earlier this year that have disabled this as an option. They are no longer allowing their Donate button to take you anywhere besides Facebook donation processing directly. So sad this is no longer an option! We will update this post to reflect the changes. Thanks for the heads up!